
There have been some things going on in my office that I haven't shared yet. There has also been some massive organizing efforts as I have moved all my office "stuff" into my new space. One of the bigger organizing projects I have recently completed in this room is the closet space.
This closet holds a lot of miscellaneous things: art/craft supplies, gift wrap supplies, sewing machine and supplies, computer software, camera accessories, books, photo albums, etc. We used to keep all of this in our office closet in our old house, but since we're using our (downstairs) formal living room as an office, it didn't have a closet for any of this stuff.
Here's what the closet looked like before I changed things around a bit:
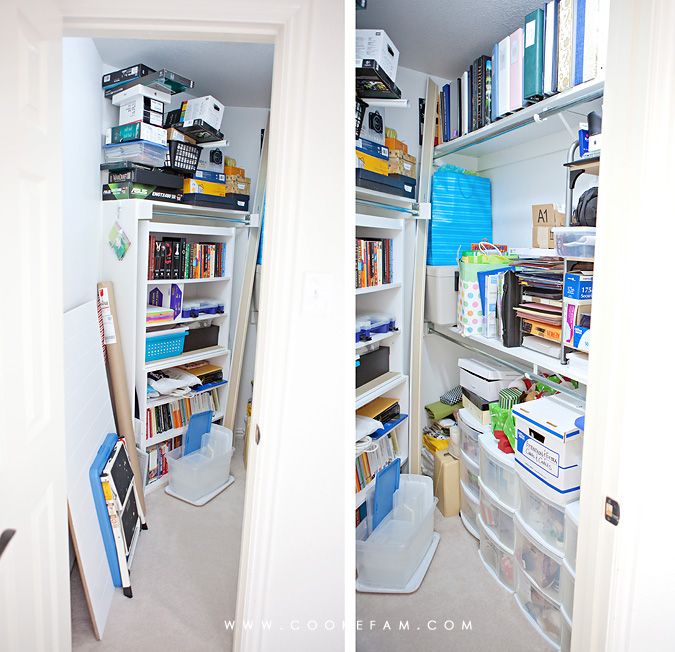
Yikes. Somewhat organized (or it started out that way), but generally a mess. I had added some makeshift shelving with some stacked shelving units, but they were not maximizing the space. And on top of that, with my new desk built-in, I knew I would want to totally reorganize this stuff and possibly move some of it over there. So I decided to start from scratch and really make this closet work for me. It was intended to be a clothes closet and obviously, we are not storing clothes in there.
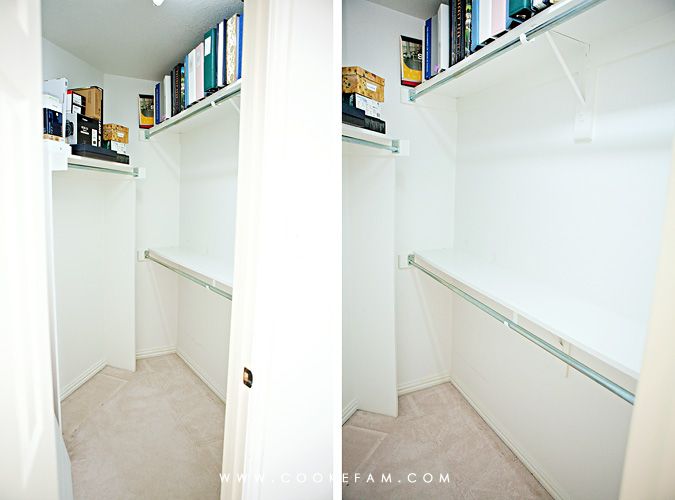
First things first...clear everything out. Here's what the closet looks like almost empty. It's a spacious closet, but the lack of shelving was limiting it's true potential.
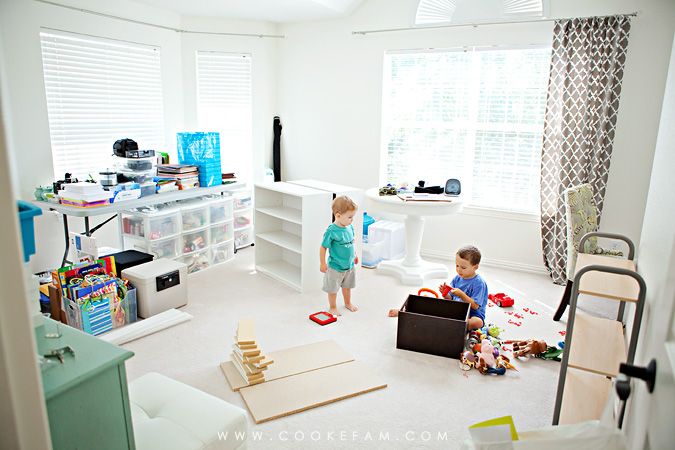
And here's what my office looked like after I cleared out the closet (below). Is it just me or does it seem like so much more stuff when it's spread throughout the room vs. in the closet? One of my goals was to use this opportunity to get rid of some of it. (But not the little boys!) Oh, and I guess you get a sneak peek of the drapes again, my office chair, and my new round white table.
First things first...clear everything out. Here's what the closet looks like almost empty. It's a spacious closet, but the lack of shelving was limiting it's true potential.
And here's what my office looked like after I cleared out the closet (below). Is it just me or does it seem like so much more stuff when it's spread throughout the room vs. in the closet? One of my goals was to use this opportunity to get rid of some of it. (But not the little boys!) Oh, and I guess you get a sneak peek of the drapes again, my office chair, and my new round white table.
Next, I added wood shelving to the closet. You can see those pieces of wood in the middle of the floor in the above photo...that's what became my shelves. I added four shelves to the left side of the closet and two long shelves on the right. And here would be the perfect spot to show the empty closet with the shelves added...except I didn't take a photo at this point. I was too excited about loading the stuff back in and organizing it all.
But, before moving on I'd like to say that there's no special method to adding these wood shelves. I simply looked at the existing ones, saw how they were constructed/supported, and copied them. I did the whole thing from start to finish by myself so this is a project that anyone can do if you know how to use a tape measure and drill. After determining the methods I was going to use, I took some measurements and went to Lowe's to pick out the wood and have them cut it all for me. The supports are pre-primed wood while the shelves themselves are laminated wood intended for shelving. I picked both of those specifically to reduce the amount of painting I would have to do. I did have to paint some and let it dry before I moved everything back in.
And now, finally, the finished product. Shelves added, hanging bars removed, everything reorganized and pared down.
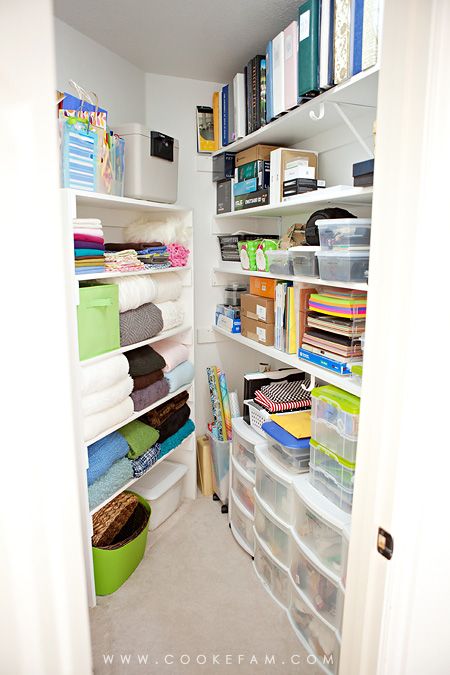
By adding these shelves , getting rid of some things, and moving some things to my new desk area storage, I was actually able to move all of my "prop" blankets, baskets, backdrops, etc. that you see on the left. That allowed me to reclaim my hallway linen closet (where those were previously stored) for actual household linens.

When I started actually spending time on getting my office in order and redone, one of the most exciting things to me was this closet. I have planned to put shelves in since we moved to this house 3 years ago. I am so happy with how it turned out, how much more storage it provides now, and the fact that it's done! Just a few more things here and there and my whole office will be done!


1 comment:
well, i don't know how to use a drill, so i guess i couldn't do it!!
very nice work...you are a queen of do-it-yourself home improvement!
Post a Comment